
Hello everybody, and welcome to the “Understanding Chess with Grandmaster Illia Nyzhnyk”, a series of short chess articles. My goal for these articles is to show you fundamental chess principles with simple examples, something you can use as a reference while learning the game and becoming a better player.
To start things off, I would like to discuss a topic that is very familiar for most people who have tried a game of chess before – the goal of the game.
Please look at the following (starting) chess position:
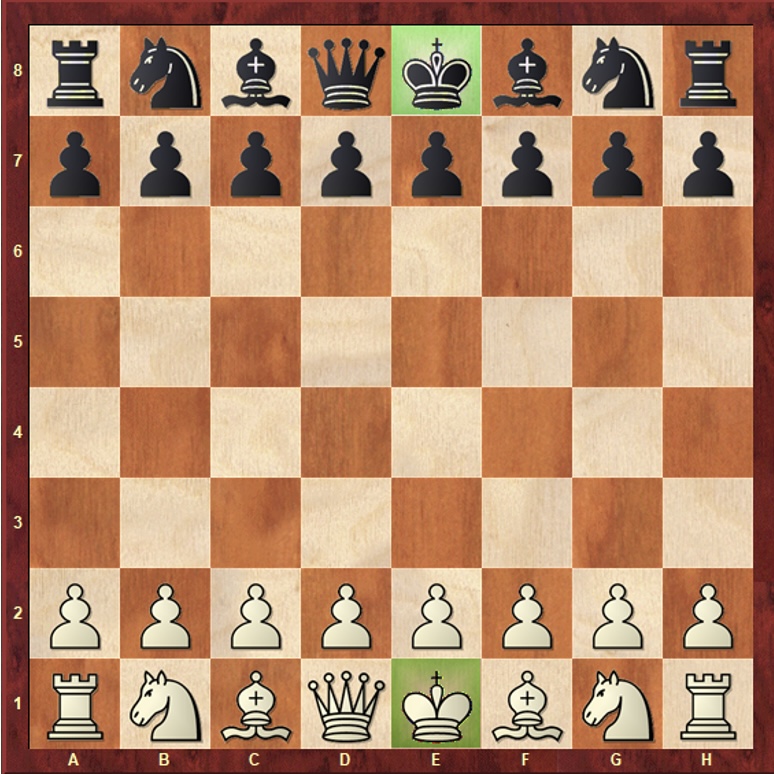
Every game of chess begins from this position, where white gets to make their first move. On the diagram above, two pieces are highlighted in green – the white king, and the black king. The two kings are unique because they are the only pieces in the entire game that cannot be “eaten” by other pieces. Incidentally, the game ends when either white or black king is attacked by any piece of the opposite color (excluding the king) and cannot run away from the attack/block the attack with another piece/remove the attacking piece. This situation in chess is known as a “checkmate” and indicates the end of the game – player who successfully checkmates their opponent’s king wins the game.
To better understand this scenario, please look at the following position:
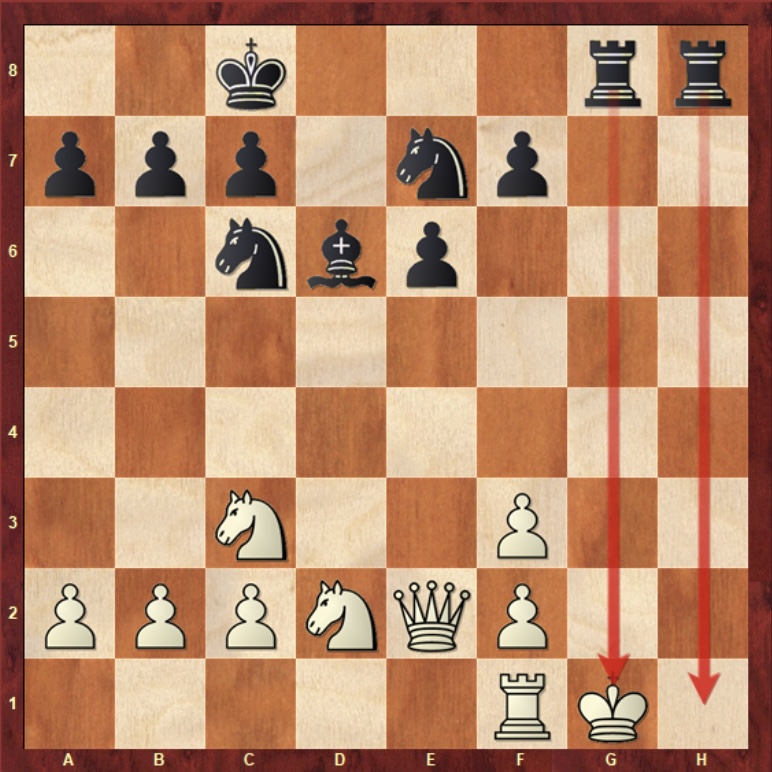
In the diagram above, red arrows indicate all the squares that are being attacked by black rooks. As we can see, the rook that is positioned on the white square is currently attacking the white king, and it so happens that we have a case of checkmate on our hands. White king cannot escape, as all the squares in front or to its right are being attacked by the black rooks, and all the squares on its left are being blocked by white pieces. White also cannot remove, or “eat” the attacker, as their pieces are positioned too far away from the black rook attacking the king. Finally, there is no white piece that can move on the line where both the black rook and the white king are to block the attack.
Fortunately, it is usually not that simple to checkmate a king. Please look at the following example:
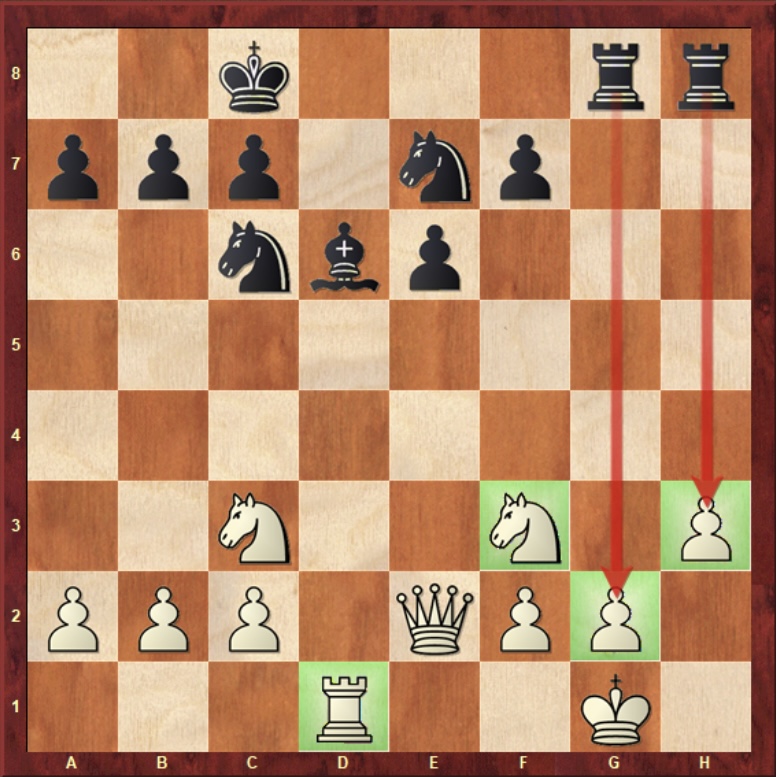
There have been a few very important changes. As you can see, the rook located on the white square is no longer attacking the king. The attack is being “blocked” by the white pawn located in front of the white king. This tells us that pawns can be used as a “shield” to defend the king. Additionally, the white knight (highlighted in green) is now positioned closer to the white king, which gives it an ability to block/defend any attack from the black rook if such a situation occurs. This means that pieces positioned close to the king are usually able to defend them from attacks. However, not all pieces that are close to the king are doing a good job. Remember, in the previous example the white rook (highlighted in green) was positioned very close to the king, to its left to be precise. However, the rook was not defending the king. In fact, it is the other way around – the rook was taking away a square that the white king could potentially use to escape the attack. This implies that not all pieces close to the king can be considered its defenders.
Thank you for reading this article!
Make sure you stay tuned for future articles, in which I will continue the discussion about the king and many other topics in the future!
A very Good lesson. Very nice way to teach about King safety
It can help me to teach. Thank you GM Ilya
Thank you, I’ve just been looking for information about this topic for a long time and yours is the est I’ve found out so far. But, what about the conclusion?