
Maia Chiburdanidze (2500) – Susan Polgar (2510)
Novi Sad Olympiad, 1990
Notes from my best-selling book Breaking Through
http://www.chesscafe.com/polgar/polgar.htm
1.e4
It used to be hard to prepare against Maia because she had a very wide opening repertoire.
1…c5
I knew that this game could impact the gold medal race. Therefore, I invited a sharp game by choosing the Sicilian Defense, as I was aiming for victory to help Hungary win the gold.
2.Nf3
The main move. White maintains the option to play the open variation (with d2-d4) or a side variation.
2…Nc6
I usually like this move. This gives me the option to decide between the Accelerated Dragon and the Sveshnikov variation.
3.Bb5
This is the Rossolimo variation of the Sicilian Defense. At one time, it was considered to be an unambitious side line. However, in the recent years it has become very popular. Unlike the more direct 3.d4, which leads to more aggressive play, in this variation White plays a more positional game.
3…g6
The next piece to develop will be my bishop on f8. 3…e6 is an equally good alternative.
4.0–0
In general, bringing the king to safety by castling is a priority. However, White could have delayed it by one move to trade on c6. After exchanging the bishop for the knight, Black will be forced to double pawns on the c-file. Black would have compensation for it by having the advantage of the bishop-pair. In this variation, it is a matter of taste as to whether to take on c6.
4…Bg7
After Black’s previous move, this continuation is a must.
5.Re1
5.c3, to prepare d2-d4, and 5.Nc3 are also common choices.
5…e5
This was a big decision. On one hand, it takes control of the e5- and d4-squares and stops White from playing e4-e5 (for example after 5…Nf6). On the other hand, it weakens the d5-square and blocks the influence of the black bishop on g7.
6.c3
This was White’s last opportunity to trade on c6, which actually is the most logical move. Otherwise why bring the bishop go to b5 in the first place.
6…Nge7
Now after 7.Bxc6 Nxc6 Black would gain the advantage of the bishop-pair without incurring doubled pawns.
7.b4
This came as a total surprise to me. It is very rarely played at a professional level. After the calmer 7.d3 0–0 8.Be3 d6, Black gets comfortable play by preparing f7-f5.
7…d6
At this juncture of the game, psychology played a big role. I was not willing to find out what Maia and her coaches prepared for me if I accept the pawn sacrifice. Although I have no doubt that Black could safely take the pawn, I think that White would get compensation in the form of activity. That is why I chose the more practical approach. I did not want her to have any psychological advantage.
8.bxc5
This was a strategic error. Opening the d-file only helps the black queen to gain power. Perhaps 8.a3 was better.
8…dxc5
At this point, I really liked my position. I thought the only chance for White to fight for an advantage was if the d-pawn can advance to d4 at the right moment.
9.d3
I expected 9.Ba3 b6 10.d4 exd4 and now either 11.cxd4 0–0 or 11.Nxd4 Bd7 (but not 11…cxd4 12.Bxe7). However, Black is fine in both of these variations. Therefore, objectively speaking, my opponent probably made the right choice.
9…a6
It is time to find out which way will the bishop go.
10.Ba4
After 10.Bc4, Black can play 10…Na5 and the bishop cannot escape from being exchanged.
10…0–0
Finally, the black king is safe and the knight on c6 is no longer pinned.
11.Be3
Developing the bishop and attacking the c5-pawn at the same time.
11…Qd6
Protecting the pawn and preparing space for the rook to come to d8. 11…b6 would be fine as well.
12.Bc2
Black has some difficulties after 12.Nbd2 Qxd3 (better is 12…b5) 13.Bxc5 b5 14.Bb3 Qxc3 (too greedy) 15.Rc1 Qd3 16.Bd5 because of the bishop pins.
12…h6
A preventive move. Without it Nf3-g5 could be an unpleasant response if Black decides to play Bc8-e6 or f7-f5.
13.Qc1
I believe my opponent anticipated my plan of playing f7-f5 in the near future. Therefore, she thought it was to White’s advantage to lure the black king to h7 on the same diagonal as White’s bishop on c2. In addition, the white queen is eyeing the a3-square to put pressure on the c5-pawn.
13…Kh7
13…g5 would not be a bad choice either. However, I did not want to give up my plan of playing f7-f5 with the ability of recapturing after e4xf5 with my g6-pawn.
14.Nbd2
Finally all the white pieces are developed. However, Black has a small space advantage.
14…b6
Securing the safety of the c5-pawn. White would gain some initiative after 14…b5 15.Nb3 c4 16.dxc4 bxc4 17.Nc5.
15.Nc4
Attacking the queen and the b6-pawn.
15…Qc7
The most obvious move. This move saves them both.
16.Rb1
Putting more pressure on the b6-pawn.
16…Rb8
Simply protecting the pawn. During the game, I did not like 16…b5 17.Ncd2 Qd6 18.Nb3. However, while writing these comments I found a nice improvement with 17…Nd4!.
17.Qa3
White seems to go in the wrong direction. Black is solid on the queenside and ready to launch an attack on the kingside. The white queen will soon be missed in the defense of the king.
17…f5
Finally! I wanted to play this move for a while, but it had to be well prepared.
18.exf5
If White does not capture the pawn, Black would play f5-f4 followed by g6-g5 and Ne7-g6 with a nice attack.
18…gxf5
All other recaptures would be a serious positional mistake, because it would leave the e5-pawn isolated. It is somewhat unusual to keep the bishop on c8 undeveloped for this long. However, the bishop is doing its job by protecting the a6-pawn. Note that the bishop could not develop to b7, because it would lock the rook into protecting the b6-pawn.
19.Bd2
Getting away from some future f5-f4 attack, as well as opening the e-file for the rook.
19…Ng6
This is an ideal square for the knight. It guards the black king and aims at the kingside for attack.
20.Ne3
The knight is heading toward the d5-square. White had a hard time coming up with a good plan. I think the knight should have stayed on c4 to attack the targets at e5 and b6. Perhaps it was time to get the queen back to the kingside.
20…Nce7
Preventing White from playing Ne3-d5.
21.Qb3
It would have been better for the knight to return to c4.
21…Bd7!
I want to get the bishop to the long diagonal a8-h1. I did not want to ease White’s problems by 21…Bb7 22.Qxb6 Qxb6 23.Rxb6 Bxf3 24.Rxb8 Rxb8 25.gxf3.
22.h3
This is a poor idea. As we will see, my opponent was trying to vacate the h2-square for the knight. But that does not look too promising.
22…Bc6
Threatening to capture on f3 and ruin White’s pawn structure.
23.Nh2
After 23.Bd1 Nf4 24.Qc2 Rbd8, the d3-pawn is in trouble.
23…Nf4
A dream place for the knight to attack the d3- and g2-pawns. The best part is that it can not be chased away with 24.g3 because the pawn on h3 would be unprotected.
24.Rbd1
Too slow. White cannot do much to address the future problems on the kingside.
24…Qd6
Swinging the queen over to the kingside to g6.
25.f3
Trying to reduce to power of the black bishop on c6.
25…Qg6
This creates a pin and threatens to win a pawn with 26…Nxh3+.
26.Kh1
Getting out of he pin to avoid losing the pawn.
26…Ned5
Trying to remove the guard of the g2 square. If 27.Nxd5 Qxg2 checkmate would follow.
27.Nhf1
After 27.Rg1, Black can increase the pressure with 27…Ne2 28.Rge1 Ndf4.
27…Nxe3
Now is the time to cash in! It is obvious that Black has an overwhelming attack. But eventually there will be a time when one needs to calculate variations that lead to material gains or checkmate.
28.Nxe3
The only sensible recapture to protect g2.
28…Qg3?!
We both had little time left to reach the fortieth move time control. Therefore, I was unable to find the quickest way to win with 28…Bxf3! 29.gxf3 Qg3 and White is helpless; for example, 30.Qc4 e4 31.d4 Qxh3+ 32.Kg1 Bxd4 33.cxd4 Rg8+ 34.Kf2 Qxf3 checkmate.
29.Rf1
Reinforcing the f3-pawn. The threat from Black is 29…Nxg2 30. Nxg2 Bxf3 31.Rg1 Qh3 checkmate.
29…Nxh3!
Time to act! Otherwise Bd2-e1 would chase the queen out.
30.d4
If 30.gxh3 Qxh3+ 31.Kg1 Bf6 32.Ng2 Rg8 33.Rf2 Bh4 wins or 30.Be1 Qg5 31.gxh3 Qxe3.
30…Nf4!
White would get some counter play after 30…Nf2+ 31.Rxf2 Qxf2 32.Nxf5.
31.Be1
White could not grab the pawn with 31.Bxf5+?, as after 31…Rxf5 the knight on e3 cannot take the rook because it is tied to defending the g2-pawn.
31…Qg5
Because of the miss on move twenty-eight, I now have to work a little harder.
32.d5
Eliminating the bishop’s attacking power toward g2 and f3.
32…Bd7
Bringing additional protection to the f5-pawn.
33.Bb1?!
33.Rf2 would be a better defense, preventing 33…Ne2.
33…Ne2
Black is threatening to checkmate along the h-file.
34.Ng4
This is possible because of the pin on the f5-pawn.
34…e4
Cutting off the bishop on b1, which was pinning the f5-pawn. After the direct 34…Qh5+, White was going to block with 35.Nh2.
35.Nh2
The knight was under attack and it simply had to move away.
35…Be5
Threatening a deadly pin with 36…Qh5.
36.Rf2
Trying to get some protection to the h2-square.
36…Qg3
This is more precise than 36…Qh5 37.g4.
37.f4
After 37.Nf1 Qh4+, White gets checkmated.
37…Bxf4
Renewing the same threats.
38.Rxf4
White has no choice.
38…Qxf4 0-1
Nice game
Thank you for analyzing this.
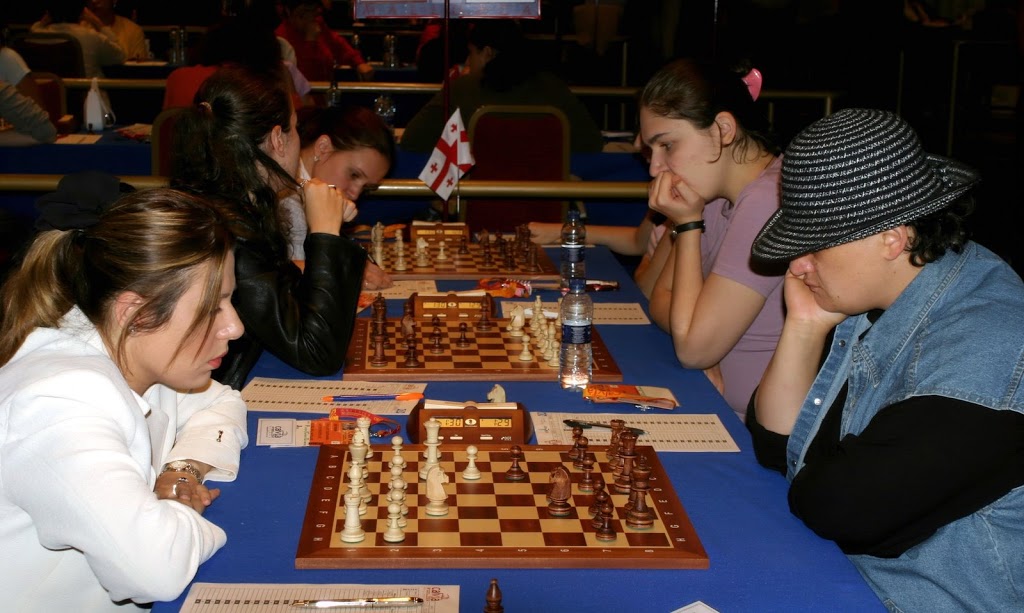
Who’s playing white it the accompanying picture?
I LIKE THIS GAME!!CONGRATULATIONS
Maia is good fellow.
Explained that way, chess seems to be an easy stuff. Alas when I’m alone facing my board……..
Nice game…thanks for the analysis….i hope to see and other analyzed games…
I have met Maia Chiburdanidze in August 1993 during Women Interzonal Tournament. She was there with Nino Khurtsidze, Nina Gurieli, with also GM Georg Georgadze and Lasha Janjagava as their seconds. But I also noticed the present of Nana Alexandria, maybe she’s the Georgia Team, non – playing Captain?
I ask Maia for an Autograph/signature,
she signed my chessbook, but asked,” Where’s my photo?” I answered,” sorry that I haven’t got any photo of yours”. She’s a nice, easy going person.
I wondered, when 15 years later, she lead the Georgia women team to become an Olympiad Champion again,
that’s a result of a true great Chess Champion.
Unfortunately, I have never meet Susan Polgar.
Please reply my comment, my dear princess Susan.
I will be happy, just to know you are there, living on the same planet with me.
“Unfortunately, I have never meet Susan Polgar.
Please reply my comment, my dear princess Susan.
I will be happy, just to know you are there, living on the same planet with me.”
Another victim of Sloanitis.